Basic Breads
There are many different types of bread. When we talk about regular bread, we usually refer to household bread.
Special bread is made with extra ingredients such as honey or milk, in addition to those used in regular bread. The finishing or topping can consist of sesame seeds, poppy seeds, and so on.
White Wheat Bread Recipe:
- Wheat flour: 1 kg
- Water: 500-560g
- Fresh Yeast: 30g
- Salt: 16g
An additional ingredient is required for a specific preparation. Fat should be added in an amount equal to 3% of the total weight of flour. (For example, 3% of 1kg Flour = 30g).
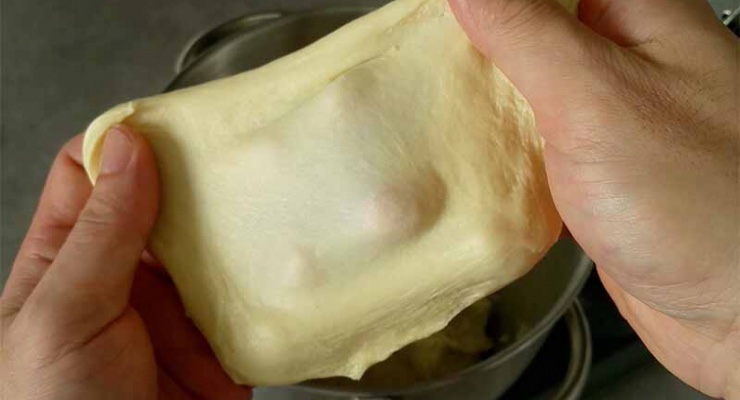
To prepare the dough, add all the ingredients to a mixing bowl. Using a stand mixer with a kneading hook attachment, turn on the lowest speed setting and knead the ingredients together until they form a dough. Then, increase the machine speed to a higher setting and continue kneading until gluten is formed. You can perform a windowpane test by stretching a small piece of dough. If the gluten is not well developed, the dough will break.
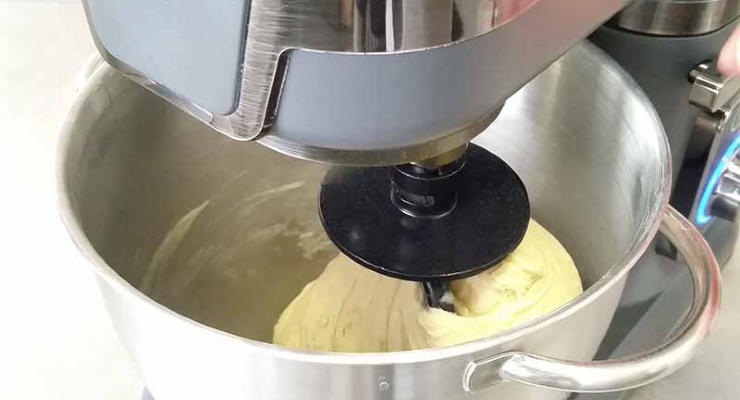
The tricky part is determining the length of the kneading process. With too little kneading, the gluten network will not form, and with too much kneading, it will break down.
Bread improver can also be added to achieve a nice end result. It is crucial to learn and feel when the dough is ready. Unfortunately, this can only be learned through experience.
When the dough is ready, it should no longer stick to the mixing bowl and should feel slightly warm when held in your hand.
The next step is to let the dough rest for the first proof. During this time, the gluten and yeast will do their work and begin producing carbon dioxide, helping the dough to rise.
Yeast
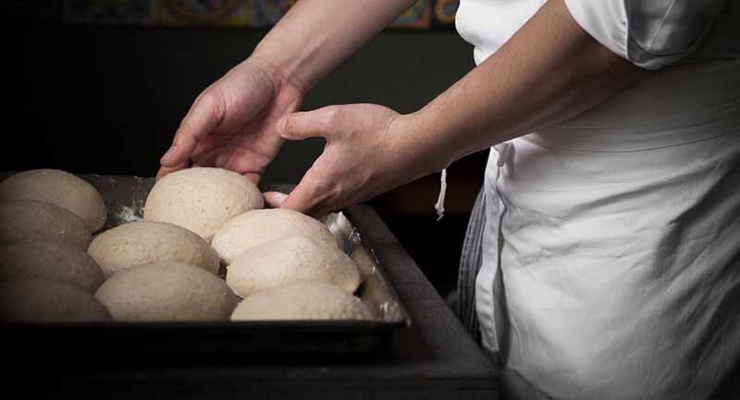
If you are using bread improvers, it is, in principle, no longer necessary for pre-proofing to take place, so you can skip the previous step. You can divide the dough into balls straight away. You have to work fast because the yeast is still working, and the weight of the dough balls may differ at the end due to the increase in volume.
Next, set the dough balls aside for proofing. You must be especially careful that the dough does not tear. This is why we put a cloth over the dough balls so that they are not subject to drafts, which could cause tearing. After proofing, you need to reshape the dough balls again by stretching and folding the dough. Once this is done, it is ready for the final proof.
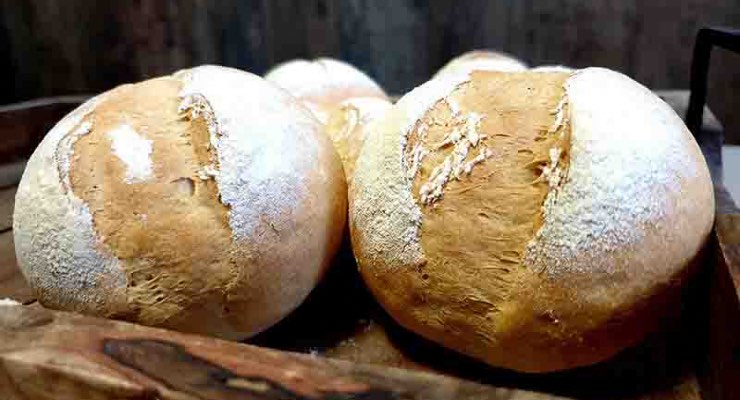
After the final proof, place the dough balls in the oven. During the baking process, you can see the dough balls still increasing in size. At a certain point, it will stop, and the shape will be preserved.
Lesson 4 Lesson 6


